Shower Faucets and Body Sprays (Plumbing Rough-In)
A shower faucet can be as simple or complicated as you prefer and like many, focus is steering away from a standard single handle faucet to spa-type configurations with multiple shower heads, spray wands, body sprays etc… (let’s face it, all we do is work nowadays so more time in the shower is a mini-vacation…). Bathroom remodeling is like clockwork for me and after 15 years in the business I was both surprised and honored to receive compliments followed by a big Thank You when I finished up a shower valve/pipe installation from one of my clients. This was the first time that I’ve come across anyone (except for another tradesman) who was interested in the “Behind the Scenes” work and have an in depth conversation about how a shower faucet works. Great topic for a blog, eh? Well here goes…
The Moen IoDigital Vertical Spa system is a nice example of an upgraded faucet that entails significant planning and overall knowledge in the plumbing field to install. In the new age of digital gadgets this system does not have a handle to turn water on… This particular faucet has a digital mounting plate and optional remote control. With the touch of a button you can use a shower head, turn on a set of body sprays, change to a spray wand individually or all at the same time. Temperature and pressure settings can be programmed for each individual which creates an enjoyable experience.
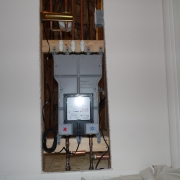
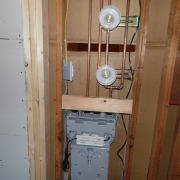
The valve body is actually a large manifold control center that requires access. A GFCI outlet must be installed to that area and other things like house water pressure/temperature must be taken into consideration when selecting this system. There are four zones included to branch out for each shower function and all are programmed accordingly after installation.
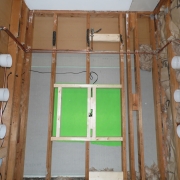
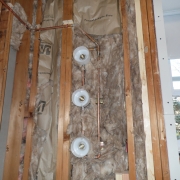
This particular shower will have one rain can shower head located in the middle and two sets of body sprays at each end of the shower. The body sprays are stacked 3-high to cover lower, middle and upper back/chest areas. Each side of the body sprays are on separate zones because of the pressure requirements.
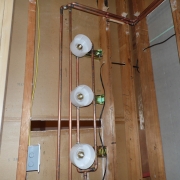
Multiple body sprays require a pressure loop. After the valve bodies are mounted (an even distance apart) the water lines must loop around to connect them together. This will ensure that each valve will receive equal water flow.
For this installation, I used ½”, Type L copper. Pex is an option however, the inside diameter of pex tubing is smaller than copper including the fittings (even smaller). Although I may have sized up the shower head with pex, keeping this system uniform throughout was in my best interest for the end result. After initial demolition, I moved the pipes to the access side underneath the floor and up through the wall where I capped them with shut off valves until other work was completed including a new subfloor to be installed. Moving back to plumbing (after all necessary prep work was complete) I completed this system in 9 hours with 40 feet of copper and 60+ solder joints. A significant amount of time and patience is required complete this before getting to the trial run stage. It’s all a part of the “Measure twice, Cut once” practice. After leak testing and valve flushing, it’s safe to move on to the next step.
For more information on Custom Tile Showers with upgrade faucet systems, please use any of our contact forms to get in touch with me!
